Polymail supports aliases for Gmail, Outlook, iCloud, and other IMAP accounts. Before adding an alias to Polymail, make sure it’s already configured in your email service provider’s settings.
Add an Alias in Polymail (Web & Desktop)
Click your name in the lower-left corner of the app
Select Settings from the menu
Go to the Accounts tab on the left
Click into the email account you’d like to manage
Scroll to the Aliases section at the bottom
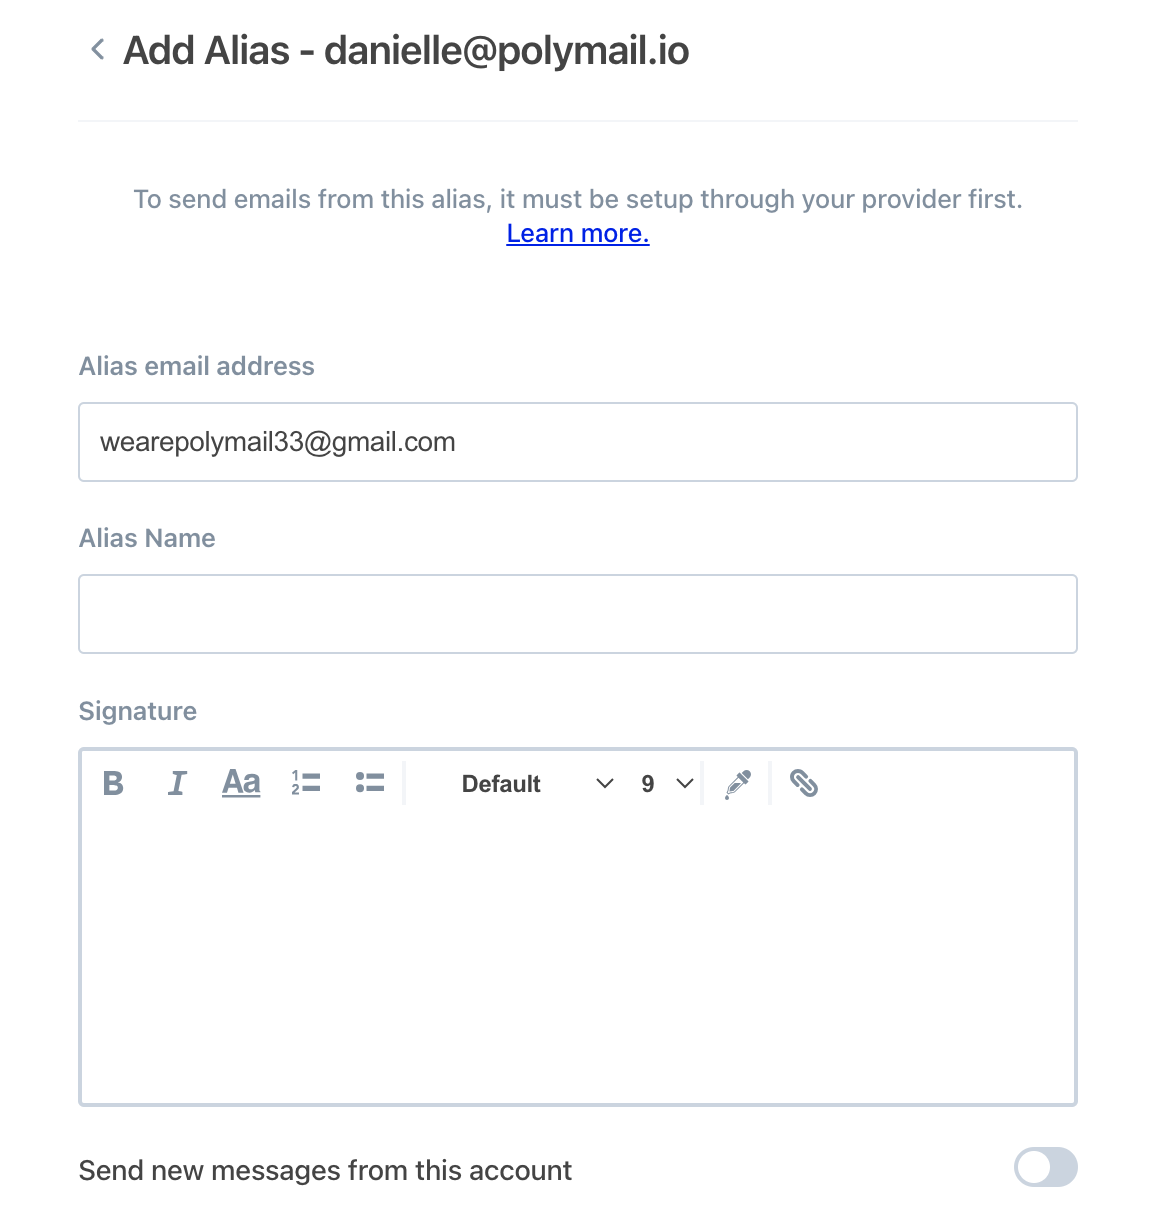
Click + Add Alias
Enter your alias and click Save
Add an Alias in Polymail for iOS
Open the Polymail app
Tap the menu icon (three horizontal lines) in the top left
Scroll to the bottom and tap the gear icon for Preferences
Select the account you’d like to update
Scroll to the Aliases section
Type in the alias and tap Save
Remove an Alias
To remove an alias from your account:
Web & Desktop:
Go to Settings → Accounts
Select the email account with the alias you want to remove
Scroll to the Aliases section
Click the alias you'd like to delete
Click the Red "Remove Alias" link
iOS:
Alias removal must be done via the Polymail Web or Desktop app at this time.
Troubleshooting: “Account Already Added” Error
If you receive a message saying “Account already added” when trying to connect an email address, it may already be added as an alias on another account in Polymail.
💡 If the alias is currently in use under another account, it can’t be added again as a full account until it's removed from the alias list.