Polymail allows you to create signatures for your email accounts and for any aliases you have added to your account.
On Polymail Web and our Desktop app, start by going to your Settings. Once you've opened your Settings:
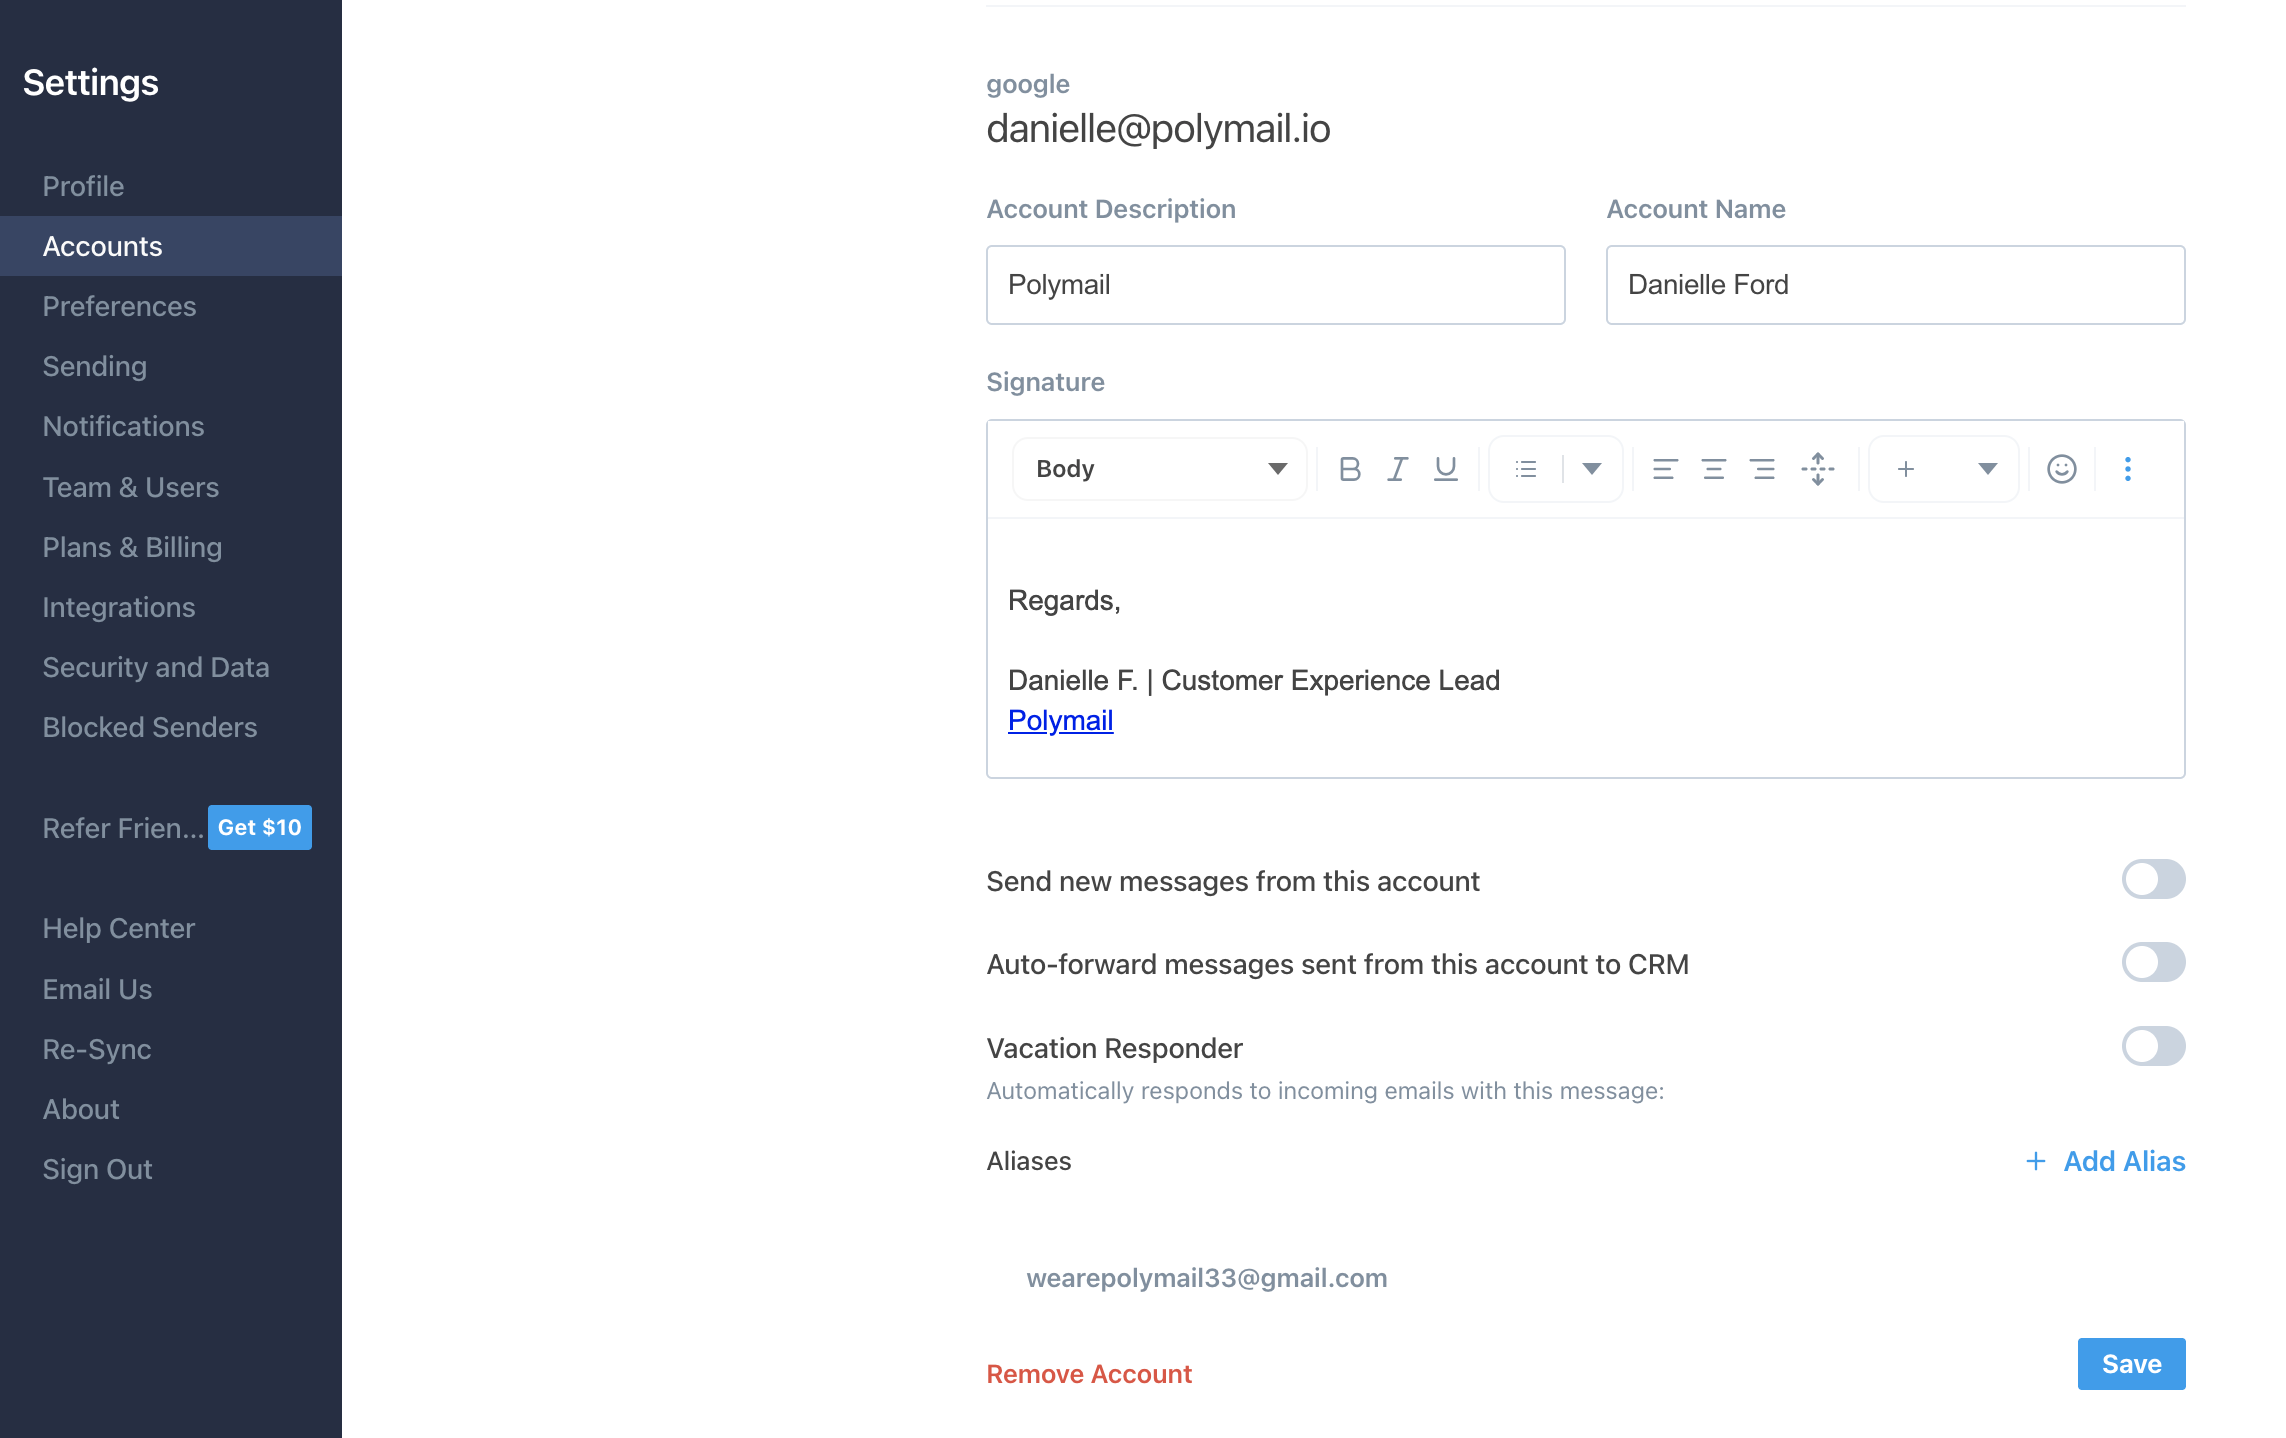
Click the Accounts tab on the left side of your screen
Click the email address you would like to create or edit your signature for
If you want to add an image, drag and drop it into the signature field.
If you're only interested in text, enter whatever you would like.
Click the blue Save button in the top right corner to save your changes.
on our iOS app:
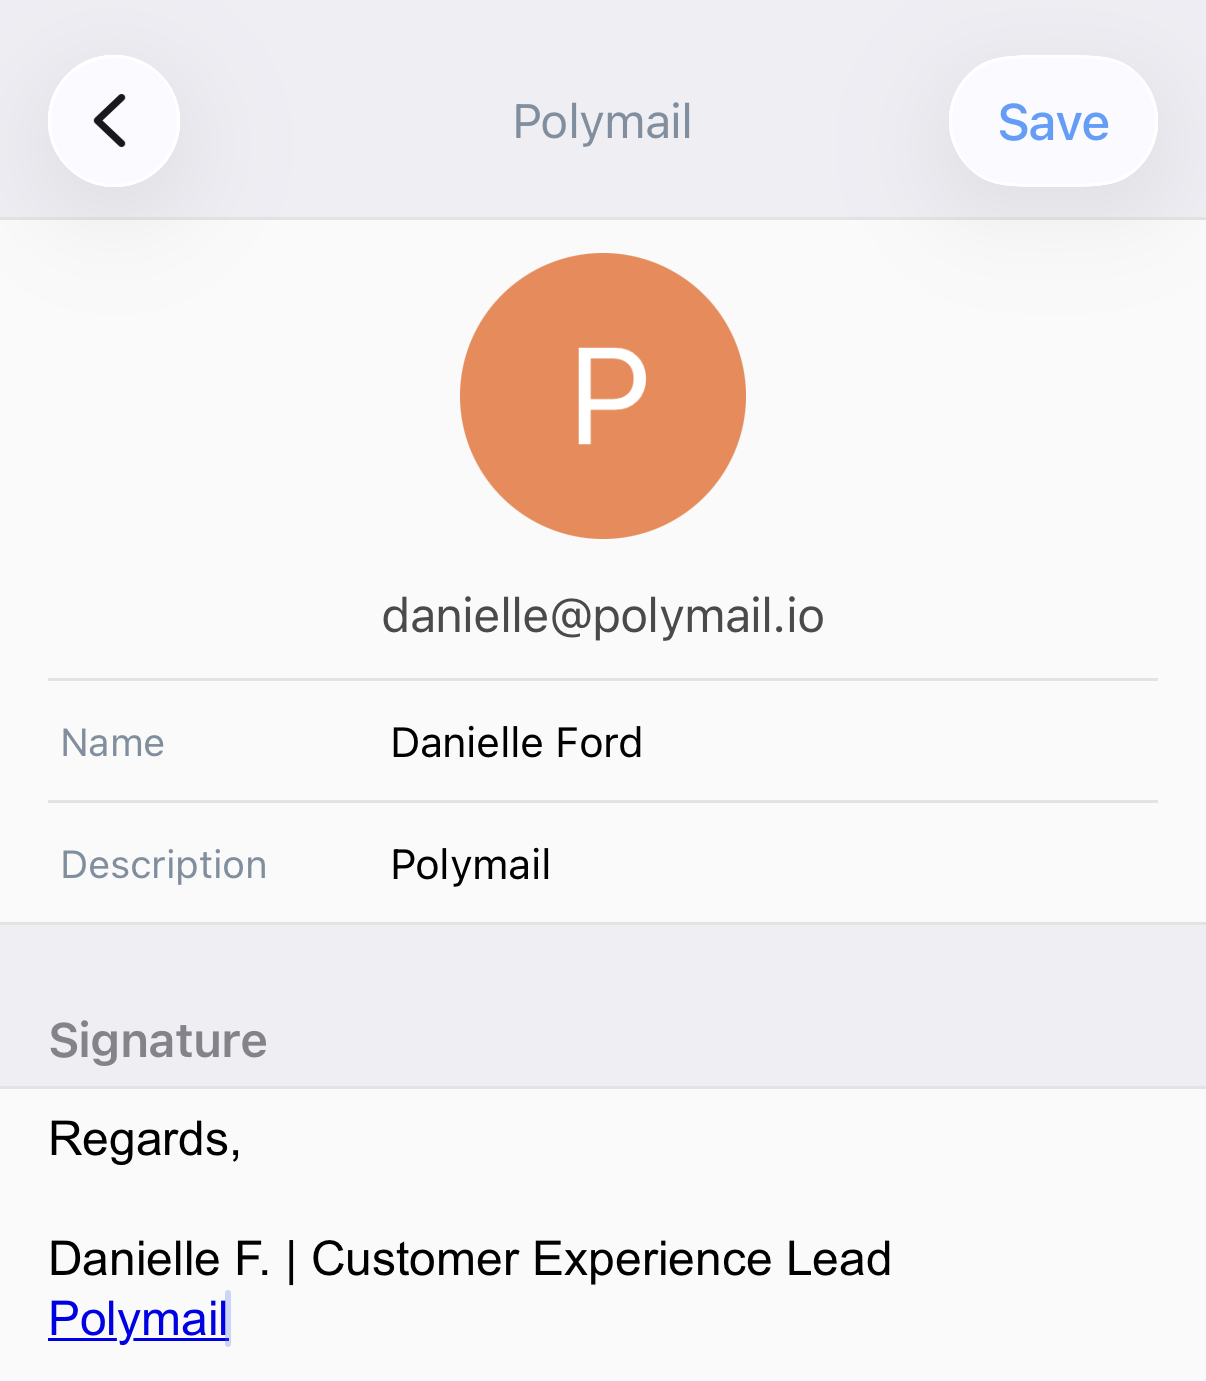
Open the settings menu
Under Accounts, click the email address you would like to create or edit your signature for
Under your name and email address, you'll see a Signature field. You can copy and paste an image into this field or edit the text.
Click "Save" in blue in the top right corner to save your changes:
If you would like to change the signature for your alias, you will need to do so on our our Web or Desktop apps.
Here's how to do that:
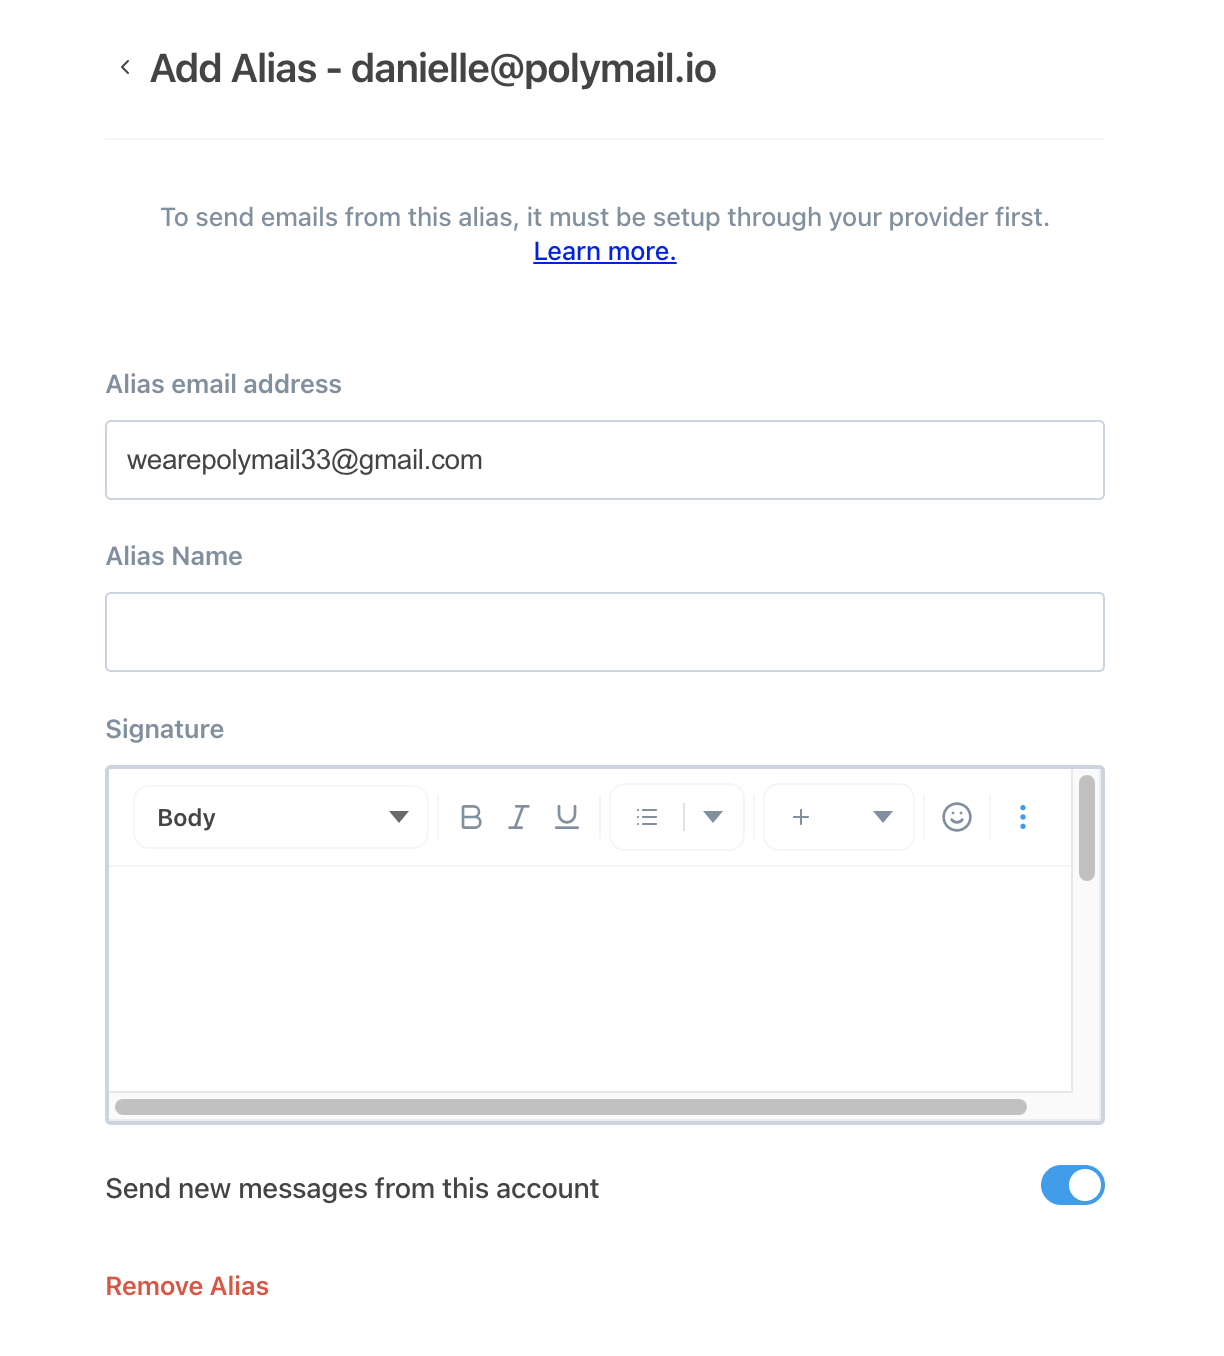
Check out the Alias section beneath the email addresses you've synced with Polymail. Find the alias you would like to create or edit your signature for, and click into it.
A new window will appear with your current alias details and signature field.
Feel free to change anything you would like (you can even remove "Sent from Polymail"), and then click the blue "Save" button to complete the process.
Note: you will only be able to do this in our Web and Desktop apps. We do not have the ability to edit alias signatures on our iOS app at the moment.